How to Install Wall Panels in Your Bathroom
Imagine remodelling your bathroom with shower panels. Find out why this durable, waterproof material works better than ceramic tiles for your bathroom wall and why it is so easy to maintain. The best place to start when reinvigorating a bathroom is with its walls, and wall panels do just that. A non-porous PVC or MDF laminate covering makes shower wall panels easy to clean and keeps grime and dirty grout at bay once installed. In our opinion, fitting shower wall panels over your existing wall tiles in your bathroom is the most cost effective option to upgrade a wet room.
You’ve just moved into your new house, your bathroom wall tiles are faded, or maybe you’re just looking for a change. Wall panels can help with all of that, and they’re cost effective at the same time!
Bathroom Tiles vs Bathroom Panels: What’s the difference between these bathroom wall treatments?
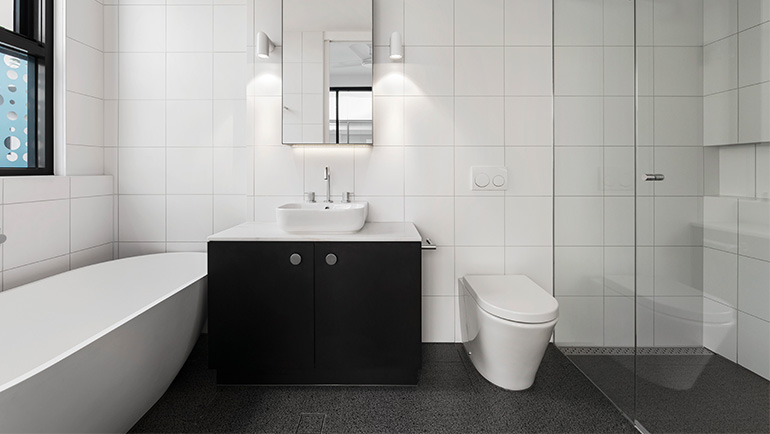
Wall coverings for your bathroom come in many different styles. The splash zones, like the walls in your shower enclosure, the area above your bath, and the space behind your basin, need protection from water.
Many people opt for tiles, because they offer a hard wearing, water-resistant surface. Recently, more and more people opt to install shower wall panels around their bathrooms as well.
The benefits of shower wall panels vs. tiles are clear to see:
- It’s easy and quick—no need for a specialist tiler for installation, can be done six times faster than tiles.
- Cost effective—Compared to tiles many shower wall panels cost less per square metre
- Watertight without grout—less work, less opportunity for bacteria to grow
- Easy to clean—just wipe with a cloth
- Overlays existing wall coverings or tiles—no need to remove your old tiles
- Stylish design options—various options to suit all decor preferences
- Long-term warranties—peace of mind that your investment will last
The traditional way to renovate your bathroom walls—aside from paint—is to install tiles, either for the entire space, or along the bath or shower. You can build an impressive feature wall from tiles, and then paint the rest of the bathroom. Tiles need to be bought and cut, and installed by a professional.
Bathroom wall panels are fast becoming a stylish alternative to tiles and paint because it’s easy to install, stylish, and cost-effective. Panels are most commonly made from PVC or water-resistant MDF, so they’re cheap to buy and replace when you want to update your styles. They’re also easy to clean!
Why are bathroom wall panels better than tiles?
As we stated, bathroom wall panels are cheaper to buy, install, and replace than ceramic tiles for your shower walls.
It’s expensive to install tiles, and most of the time you have to hire a pro. Since tiles are more fragile than panels and therefore prone to breakage, you will need to reinstall the broken tile, fitting it around the existing tiles.
A laminate coating or PVC finish makes wall panels in your bathroom completely water-resistant. Besides keeping your walls clean, this prevents condensation from building up.
Even though tiles are waterproof, they still need to be cleaned more often because mould can grow in the grout around them, causing serious health problems. As panels don’t need grout and are easier to clean, bacteria can build up and become mouldy less easily.
Can you put bathroom wall panels over tiles?
Wall panels can be installed over existing tiles. You don’t need to remove your tiles; just slot your shower panel in place using the tongue and groove mechanism and voilà!
Wall panels are also easier to maintain and waterproof than traditional tiles.
It can be applied to a lot of existing surfaces, including tile. Easy to work with and no special tools are needed – just a sharp, fine tooth saw blade. Seams are virtually invisible with tongue-and-groove edges.
Step-by-step Bathroom Wall Panel Installation Instructions
You’ve picked your perfect bathroom wall panels; now it’s time to install them. Our easy step-by-step installation instructions will show you the quick and easy way to transform your bathroom.
Start by taking a measurement of the area where your wall panels will go. Measure both the horizontal and vertical areas for each wall you want to cover.
Step 1: Dry-fit the shower panel
You’ll need to lay your shower wall panel flat on supports so it faces upwards and then trace the cutting lines.
Test-fit the panels and cut if necessary. Trim panels along the wall’s edge, not where two panels meet. A track saw or circular saw with a cutting guide is the most effective tool for trimming big panels like these. Make sure you cut and remove the excess wall panel carefully with a fine tooth or electric saw.
NOTE: Remember to put on safety goggles before using these tools!
If you’ve cut panels, make sure you seal them thoroughly before installing. Using the sandpaper to rough up the surface will make it much easier for your adhesive to stick. You can use sandpaper or a sanding pad to smooth out the cut edges. It creates a smooth finish while removing any nasty debris or leftover bits of MDF or laminate.
Pro Tip: You can use tape to help protect the edges when you cut the sides of the panel.
Step 2: Add the trim
You’ll need to install the trim before you fit your panel. You’ll need an adhesive sealant—and possibly a screw to hold it in place.
Seal your wall and place the corner trim piece if you’re panelling around a corner.
Pro Tip: Use tile spacers under your panels so you can add sealant later.
Step 3: Apply adhesive to the wall
Ensure your bathroom walls are clean and dry before installing wall panels. Clean the back of the panel using denatured alcohol and let it dry. Start by applying adhesive to the back of the first panel.
PRO TIP: Start at a corner if you’re panelling one.
Seal the inside of the trim and the very edge of the wall panel itself with adhesive sealant. Make sure the cut edges of your panel are angled right into the trim.
Now it’s time to place your panel. But first, you must apply a shower wall panel adhesive for the specific purpose.
To start, draw a thin line of adhesive down either side of the panel before you zig-zag the top and bottom for better coverage. Finally, draw big circles with your adhesive using a flat spreader.
Put three strips of foam tape along the panel and remove the paper from the back. Be sure that the panels are positioned correctly before pushing them down. The tongue and groove mechanism is used to secure the panel in place.
Repeat this process with your remaining wall panels.
Step 4: Install the panels
Once you’re satisfied with the position of the shower panels, press the first back wall panel into place. Start by applying a bead of colour-matched seam sealer to the tongue on the panel, and then apply adhesive to the back of the next panel to install it.
Tip: The joints on shower enclosure panels are tight, so it might be a good idea to find a helper. Alternately, tile-setting suction cups are also a big help.
Step 5: Ensure the seam is clean
Clean off any excess seam sealer with denatured alcohol after you press the panels together. If the adhesive does not hold the panels in place, you may need to use bracing boards.
Step 6: Cut holes for fixtures
Make sure the holes for the shower fixtures are on the right panel using a hole saw or a jigsaw with a fine tooth blade.
Step 7: Install the side panels
Use adhesive on the backs of the side panels and seam sealer on the tongue-and-groove joints like you did for the back panels.
Step 8: Caulk joints
Make sure you seal the corner trim where the panels meet using a seam sealer. Trim the outside corners of the shower panel using a 2,5 centimetre aluminium angle and construction adhesive.
Enjoy your new shower wall panels
Creating your dream shower is as easy as 1-2-3 with shower panels. Best of all, it’s DIY-friendly and doesn’t require power tools to install. Don’t be afraid to install shower panels yourself. With our step-by-step installation instructions, you’ll have a killer shower in no time at all.
Still not up for the job? We can help. Best of all, we’re longstanding professionals in the industry and registered in England and Wales. Contact us today for a free quote.