How to Change Bath Taps: A Step-by-Step Guide
Changing bath taps may seem like a daunting task, but with a little knowledge and the right tools, it can actually be a straightforward process. In this step-by-step guide, we will walk you through the process of changing your bath taps, from understanding the basics to installing the new taps. So, let’s get started!
Understanding the basics of bath taps
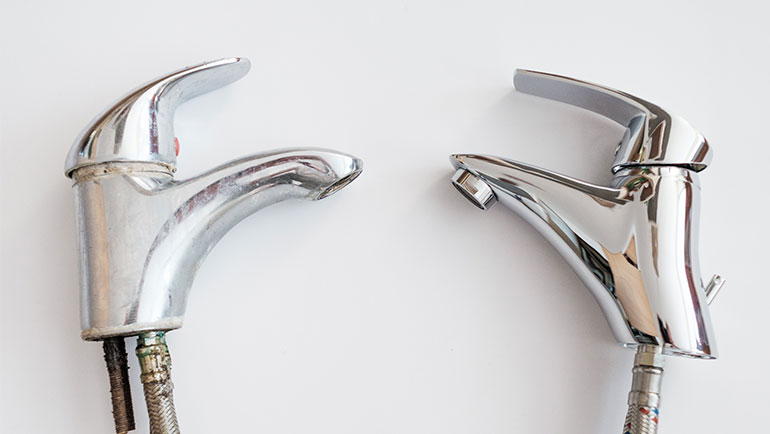
Before diving into the tap replacement process, it’s important to familiarize yourself with the different types of bath taps and how they work. Bath taps come in various styles and designs, but the most common ones are mixer taps and pillar taps.
When it comes to choosing the right bath taps for your bathroom, it’s essential to consider not only the aesthetics but also the functionality. Mixer taps, for example, offer convenience and efficiency by allowing you to adjust the water temperature to your liking with a single handle. On the other hand, pillar taps provide a classic and traditional look while offering separate controls for hot and cold water.
The different types of bath taps
Mixer taps, as the name suggests, combine hot and cold water to provide you with a customized water temperature. On the other hand, pillar taps have separate hot and cold water controls.
For a more modern and sleek appearance, you might opt for a waterfall tap that creates a luxurious cascade of water into your bath. Alternatively, a deck-mounted tap offers a space-saving solution by being installed directly onto the bath itself, perfect for smaller bathrooms.
How bath taps work
Regardless of the type, bath taps generally work by controlling the flow of water through a valve mechanism. When you turn the tap handle, it opens or closes the valve, allowing water to flow or stopping it completely.
Inside the tap, there are rubber washers or ceramic discs that create a watertight seal when the tap is closed, preventing leaks. Understanding the inner workings of your bath taps can help you troubleshoot common issues such as dripping or stiff handles, ensuring your bathing experience remains smooth and enjoyable.
Gathering the necessary tools
Before you begin the tap replacement process, make sure you have all the required tools handy. This will save you time and make the task a lot easier.
It’s always a good idea to lay out all your tools in an organised manner before starting any DIY project. This not only helps in keeping track of everything but also sets the right tone for the task ahead. A clean workspace with all the necessary tools at arm’s reach can make the job much more efficient.
Tools for removing old taps
To remove the old taps, you’ll need a wrench, an adjustable spanner, and a screwdriver. These tools will help you loosen and detach the taps from the bath.
Before you begin removing the old taps, it’s advisable to turn off the water supply to avoid any unwanted leaks or spills. This can usually be done by locating the shut-off valves under the sink or near the water heater. Once the water supply is turned off, you can proceed with confidence, knowing that you won’t be greeted by any unexpected water surprises.
Tools for installing new taps
When installing the new taps, you’ll need a new set of taps suitable for your bath, a tape measure to ensure proper positioning, and plumber’s tape to create a watertight seal.
Before you start installing the new taps, take a moment to inspect the area where the old taps were removed. Check for any signs of wear and tear, such as corrosion or limescale build-up, and clean the area thoroughly if needed. This will ensure a smooth and secure fit for your new taps, prolonging their lifespan and maintaining the aesthetics of your bathroom.
Preparing for the tap change
Before you start removing the old taps, it’s important to take some safety precautions and turn off the water supply to avoid any accidents.
When preparing for a tap change, it is essential to consider the tools you will need for the job. Gather a set of adjustable wrenches, a screwdriver, and possibly some penetrating oil to help loosen any stubborn fittings. Having these tools at hand will make the process smoother and more efficient.
Safety precautions to take
Ensure that you have protective eyewear and gloves on to protect yourself from any potential hazards. Additionally, make sure you have a towel or bucket nearby to catch any water that may spill during the process.
Furthermore, it is advisable to wear old clothing or an apron to protect your clothes from getting wet or damaged while working on the taps. This will help you stay comfortable and clean throughout the task.
How to turn off your water supply
Locate the water shut-off valve for your bath. This is usually located under the sink or behind an access panel. Turn the valve clockwise to shut off the water supply.
If you are unsure about which valve controls the water supply to your taps, consider consulting a plumber or checking your home’s plumbing layout to identify the correct valve. It is crucial to shut off the water completely to prevent any leaks or water damage during the tap replacement process.
Removing the old bath taps
Now that you’re all prepared, it’s time to remove the old bath taps. Follow these steps to ensure a smooth removal process.
Before starting the process of removing the old bath taps, it’s essential to turn off the water supply to the taps. This can usually be done by locating the isolation valves near the taps and turning them clockwise until they are fully closed. This step is crucial to prevent any water leakage or accidents during the removal process.
Loosening the taps
Use a wrench or an adjustable spanner to loosen the nuts holding the taps in place. It’s important to apply steady pressure and avoid using excessive force to prevent damaging the fittings.
Older taps may have accumulated grime and limescale over time, making them harder to loosen. In such cases, applying a penetrating oil to the nuts and allowing it to sit for a few hours before attempting to loosen them can help ease the process.
Detaching the taps from the bath
Once the nuts are loose, use a screwdriver to detach any remaining screws holding the taps in place. Gently pull the taps away from the bath, ensuring you don’t damage any surrounding fixtures.
Inspect the area around the taps for any signs of water damage, such as mould or mildew, which could indicate a leak that needs to be addressed before installing the new taps. It’s also a good idea to clean the exposed area thoroughly to ensure a clean surface for the installation of the new taps.
Installing the new bath taps
With the old taps successfully removed, it’s time to install the new taps. Follow these steps to ensure a proper installation.
Positioning the new taps
Measure the distance between the tap holes in your bath using a tape measure. Use these measurements to position the new taps correctly. Ensure that the taps are centred and aligned properly with the existing pipework.
When positioning the new taps, it’s essential to consider the aesthetics as well as the practicality. Optimal placement not only ensures a functional water flow but also enhances the overall look of your bath area. Take into account factors such as ease of use and visual symmetry to create a harmonious bathroom space that is both stylish and efficient.
Securing the taps in place
Once the taps are positioned correctly, use a wrench or an adjustable spanner to tighten the nuts and secure the taps in place. Make sure the taps are firmly attached to prevent any leaks or wobbling.
Properly securing the taps is crucial to avoid any future issues such as water leakage or damage to the pipework. Take the time to ensure that the nuts are tightened securely, but be careful not to overtighten them, as this could lead to damage. A well-secured tap not only functions effectively but also adds to the longevity of your bathroom fixtures.
Changing bath taps doesn’t have to be a stressful task. By following this step-by-step guide and having the right tools at hand, you can successfully replace your bath taps and enjoy a refreshed look in your bathroom. Remember to take your time and exercise caution throughout the process, and if you’re unsure about any steps, don’t hesitate to seek professional help. Happy tap changing!


